Canon Printer Keeps Trying to Print from the Rear Tray – A Complete Guidance!
Are you experiencing the frustration of your Canon printer incessantly attempting to print from the rear tray? Don’t let this minor setback dampen your printing experience.
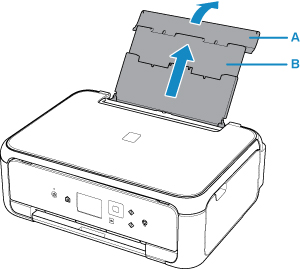
Canon loads paper in the rear tray instead of the cassette tray; it may be due to a paper mismatch setting in the feed settings. To address this, check and adjust the feed settings on your printer to ensure they match the paper source you intend to use.
This guide will explore the reasons behind this issue and offer effective solutions to ensure your Canon printer operates smoothly.
Why is My Printer Using the Rear Tray? – For Those Who Don’t Know!

Understanding why your printer defaults to the rear tray involves considering a few factors. One primary reason is the default settings configured on your printer. In many cases, printers are set to prioritize the rear tray over other available options. This means that if the default settings are not adjusted, the printer will automatically choose the rear tray for printing.
Another factor to consider is the paper size mismatch between your print job and the loaded paper in the front tray. If the paper sizes do not align, the printer may switch to the rear tray as it assumes the appropriate paper for the job might be there.
To address this, let’s explore a step-by-step guide on rectifying the Canon printer’s rear tray problem.
How to Fix the Canon Printer’s Rear Tray Problem – Guided Steps!

Step 1: Check Default Settings
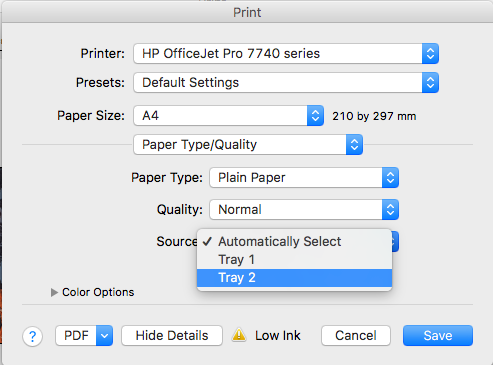
Navigate to your printer settings and ensure that the default paper source is correctly configured. Adjust it to prioritize the front tray or the appropriate source for your print job.
Step 2: Verify Paper Sizes
Confirm that the paper loaded in the front tray matches the size specified in your print job. A discrepancy in sizes can lead the printer to automatically choose the rear tray. Aligning the sizes ensures your Canon printer picks the correct tray for printing.
Step 3: Update Printer Drivers
Outdated or corrupted printer drivers can contribute to printing irregularities. Visit Canon’s official website to download and install the latest printer drivers compatible with your device. This simple step often resolves unexpected printing behaviors.
Step 4: Power Cycle Your Printer
Perform a complete power cycle by turning off your printer, unplugging it from the power source, and waiting for a few minutes before plugging it back in. Restart your printer and check if the issue persists. Sometimes, a quick reset can work wonders.
Step 5: Consult the User Manual
Canon printers come with comprehensive user manuals that offer insights into troubleshooting common issues. Refer to the manual for specific instructions on adjusting paper settings and resolving problems related to the rear tray.
By following these straightforward steps, you’ll be on the path to seamless printing. For more additional information, click on the website link. Don’t let a misbehaving printer slow you down – take control and enjoy hassle-free printing with your Canon device!
Read More: Canon MX922 Printer Not Connecting to Wi-Fi – Causes and Solution In 2023!
Why Does My Printer Keep Printing from the Wrong Tray? – Take Analysis!

It can be frustrating when your printer seems to have a mind of its own, consistently choosing the wrong tray. This issue may stem from software glitches, incorrect default settings, or a lack of synchronization between your printing device and the computer.
Fear not; the following steps will guide you on how to regain control over your Canon printer’s paper source.
Read More: Independent-Supplier Print Cartridge Is Set – Everything You’re Looking For!
How Do I Change the Default Paper Tray on My Canon Printer? – Let’s Explore!

1: First of all, Access Printer Properties:
On your computer, navigate to the Control Panel and select “Devices and Printers.” Right-click on your Canon printer and choose “Printer Properties.”
2: Then, Adjust the Paper Source Settings:
Within the Printer Properties, look for the “Paper/Quality” tab. Here, you can modify the default paper source settings. Ensure that the front tray or your preferred tray is set as the default source.
3: Last but not least, Save Changes:
After making the necessary adjustments, click “Apply” and then “OK” to save your changes. This ensures that future print jobs default to the designated tray.
By following these steps, you reclaim control over your Canon printer’s default paper tray and eliminate the inconvenience of unexpected tray selections. You can read more information about this topic by clicking on the inserted link.
Read More: Gcode Not Showing Up On Printer – Reasons And Solutions In 2023!
Frequently Asked Questions
1: Is It Necessary to Change the Paper Source to Match the Purpose?
Yes, aligning the paper source with the intended print job is crucial to avoid the printer defaulting to the rear tray. Always check and adjust the paper source settings according to your printing needs.
2: Does the iPad on iOS 11 Keep Printing from the Rear Tray?
This issue can occur due to compatibility issues between the iPad and the printer. Ensure that your printer firmware and iOS are up to date. If the problem persists, consult Canon’s support for specific guidance on resolving iPad-related printing concerns.
3: Printer Says Out of Paper But Has Paper?
This discrepancy can arise from misaligned paper sensors or a malfunction in the paper feed mechanism. Gently realign the paper, ensuring it is properly loaded in the tray. If the issue persists, it’s advisable to contact Canon’s customer support for further assistance.
Wrapping up the discussion:
If your Canon printer keeps attempting to print from the rear tray, check the printer settings on your computer. Ensure that the default paper source is set to the desired tray in the printer preferences or properties menu.
Additionally, make sure the paper guides in the rear tray are adjusted correctly to match the paper size you are using, and let your Canon printer shine as the reliable companion it was designed to be.
Read More:


